Monday 29 February 2016

Guest Lecture 9 - Emma Tunbridge

Emma Tunbridge stood in to talk to us in place of her husband. 

when she did her degree she didn't have any idea what she wanted to do and it was the same when she started assisting... 5 years later she specialised and got an agent, she then started shooting kids. 
This was because when she was doing a shoot focusing on the nude form, a mother with a new born baby came to her, she was taking pictures of this baby and showing them to people and she said it was the first time she felt she could really talk about her work. 

The thing she had been searching for the "oh my god I'm doing the right thing" feeling was there. it happened eventually. The decision to shoot kids as a living was a financial one. 

one piece of advise she gave us that she wished she had done when she was at  university was to tick the boxes and listen to the lecturers they are there to help and play by there rules. 

You can do lots of things from your photographic degree: 
STUDIO ASSISTANT
LIGHTING ASSISTANT
DIGITAL OPERATOR
IN HOUSE RETOUCHER
FREELANCE RETOUCHER
SOCIAL/WEDDING PHOTOGRAPHER
STUDIO/ IN HOUSE PHOTOGRAPHER
COMMERCIAL PHOTOGRAPHER
REPORTAGE PHOTOGRAPHER
CRUISE SHIP PHOTOGRAPHER
UNIVERSITY TECHNICIAN
PHOTOGRAPHY TEACHER
PHOTOGRAPHY LECTURER
ETC

She talked about Income and how much she had earned each year: 


 she explained how she got to where she is. She told us to take the first step, talk to or email someone and the ball will start rolling, she wish she hadn't of done the things she had before going into photography, she was stuck in a little town and stuck in the call centre, she wis she had worked for free with internships and lived in London, being a photo assistant in a studio didn't bring her the contacts she needed and wanted. 
She got two jobs assisting two different photographers and then once she got those two names under her belt she started to get more and more assisting jobs. 

she thinks its a lot easier to use children as a story telling tool, and it is very hard to get that chaos from adults that you can from kids.

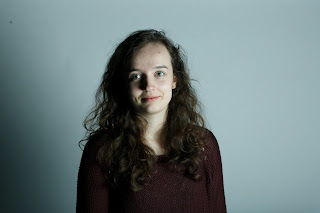
By far Emma Tunbridge has been my favourite guest lecture we have had, because she is an actual photographer who is taking photos in an area that i want to progress into. I found her talk interesting and engaging and she actually talked about the kinds of things we needed to know, giving us an idea of wages and the kinds of jobs you can get once you have your degree.  

Sunday 28 February 2016

Workshop 13 - The Road Less Travelled 2 - Indirect Light


Wine glass on white- light the wine glass supplied, to the best of your ability, with indirect light. Reflectors can be used. The glass should be clearly defined against an evenly lit white background. 


 Wine glass on black– light the wine glass supplied, to the best of your ability, with indirect light. The glass should be clearly defined against an evenly lit black background 


Guest Lecture 10 - Dominic Hawgood


The Real and Re-thinking Photography 

A graduate of the Royal College of Art, Dominic Hawgood won the 2015 British Journal of Photography International Photography Award with his series ‘Under the Influence’ that explores .  His work combines photography, CGI, lighting design and installation.

I don't remember Dominic Hawgood showing us any original work, I only remember him showing us other peoples work.
Hawgood wrote a thesis on Realism called "The Therapeutic Real"  
Some of his own work that he did show us was called "under the influence" where he took photos in African Churches in London 
Haw good Got an award for his work, he does more cinematic things than photography now and plays a lot with the idea of realism, 
Overall I didnt really get that mush out of this Lecture, but then again they aren't always going to appeal to everyone. 


Workshop 12 - The Road Less Travelled 1 - Indirect


Bright Metal- Light the reflective metal object supplied, to the best of your ability, with indirect light. Reflectors can be used. The metal should appear bright in your image. 


Black Magic– use black card to introduce black reflections to some areas of your image (e.g. black card can be used to introduce black re- flections on the edges of your subject to help differentiate it from the background). 

Using the images on this handout as inspiration set about creating an indirect-
light creative still life. Consider quality of light, shadow, reflection and composition. Think about the ‘feel’ of your image. It is important to remember that it is the creative intention of the photographer that determines the end result, not the subject. 


Sunday 14 February 2016

workshop 11 - Beam Me Up Scotty - Direct light


Using one light make a still-life image that utilises a strong shadow from your subject. Do not use reflectors (these will add indirect light to your image). 


Using one light make a still-life image that reveals the texture of your subject. Different subjects can be used for shot one and two if required. 
Using the images on this hand out as inspiration set about creating a direct-
light creative still life. Consider quality of light, shadow, texture and composi- tion. Think about the ‘feel’ of your image. It is important to remember that it is the creative intention of the photographer that determines the end result, not the subject. 


Workshop 10 - The Oliver Reed Session


Set up a Colorama paper back drop. Set up a 'key' flash with an appropriate attachment to make a hard-light portrait. Position a model in front of your backdrop. Take a flash meter reading. Take a photograph. 
Consider adding a second light.Could this be a fill-light,background light, side-light or back-light? Take a meter reading and shoot 


Consider adding a third light.Could this be a fill-light,background light, side-light or back-light? Take a meter reading and shoot. 
Using the images above as inspiration,set about creating a hard-light creative portrait. Consider location, consider quality of light, consider colour of background, exposure of background. Above all make the re- sults hard and dramatic. 


Evaluation:- 
1. The quality of light: hard vs. soft.: Hard light creates a more dramatic image to look at where as soft light creates a more flattering image.


2. The hardness of the shadow on the model: The shadows on my face are very harsh they are hard lines rather than soft lines. this creates an almost Curo-scuro lighting, especially in the black and white images 

3. The area of the background lit, and the quality of light used.: We used Ellencrom lighting system and the background in the first two images has been lit with residual light that is not hitting me (the model) the last two images on the other hand we have created the invisible backdrop. 


Tuesday 9 February 2016

Workshop 9- The Barbara Cartland Session - soft light


Our task for this workshop was to:
Use flash, ambient or other lights in combination to create a soft and flattering portrait. 

Part 1 - 
Set up a Colorama paper backdrop. Set up a 'key' flash with an appropriate attachment to make a softly lit portrait. Position a model in front of your backdrop. Take a flash meter reading. Take a photograph. 

  1. Part 2 - 
    Use a large white polyboard to reflect and fill any shadows. Take a me- ter reading and a photograph. 


    Part 3 - 
    Consider adding a second light. What attachment(s) might work? Where should/could this light be placed? Take a meter reading and shoot 

    Part 4- 
    Consider adding a third light. What attachment(s) might be appropriate? Where could/should this light be placed? Take a meter reading and shoot. 

    Over all I think this shoot was a success however i had no real part in set up as I was the model.